20 Microcement Bathroom Ideas for a Seamless, Spa-Like Calm

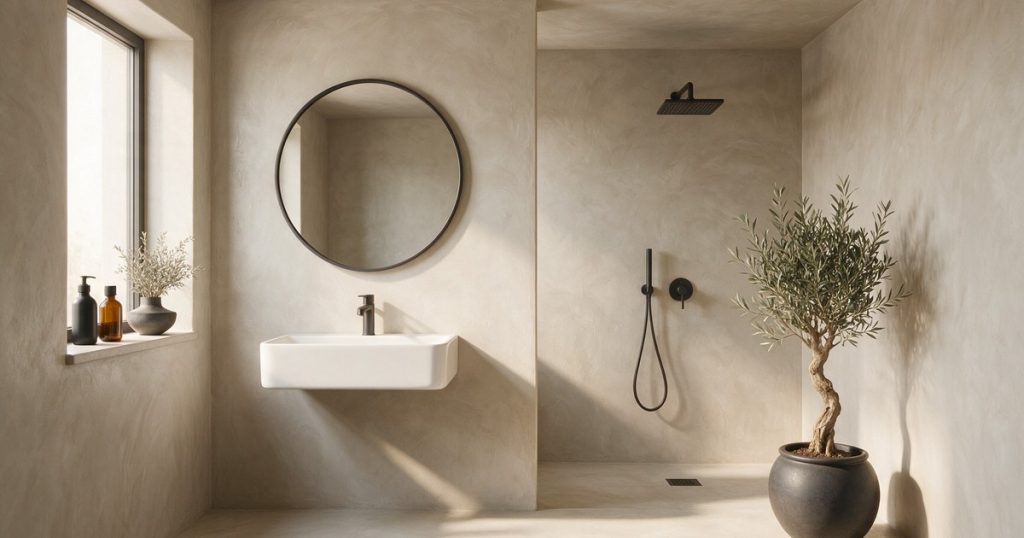
Grout lines are the thing I never miss. Once you have lived with a bathroom where every tiny channel of grout turns grey and needy, the idea of a wall you can run your hand across with nothing to catch on starts to feel like a small miracle.
That is the whole appeal of microcement, the seamless and soft troweled plaster that wraps a bathroom in one continuous matte skin. Think tadelakt’s modern cousin: pigment-rich, hand-smoothed, warm underhand, and able to pour straight over the floor, up the walls and around the tub with no joins.
Below are twenty ways I would use it, each with the palette, the finish, and the one move that makes it work.
A quick note before we start. Microcement (the fine cement-based coating applied in thin layers, sealed waterproof) is a surface, not a style, so it bends to whatever mood you bring it. Let’s get into the looks.
1. Microcement Floor Bathroom
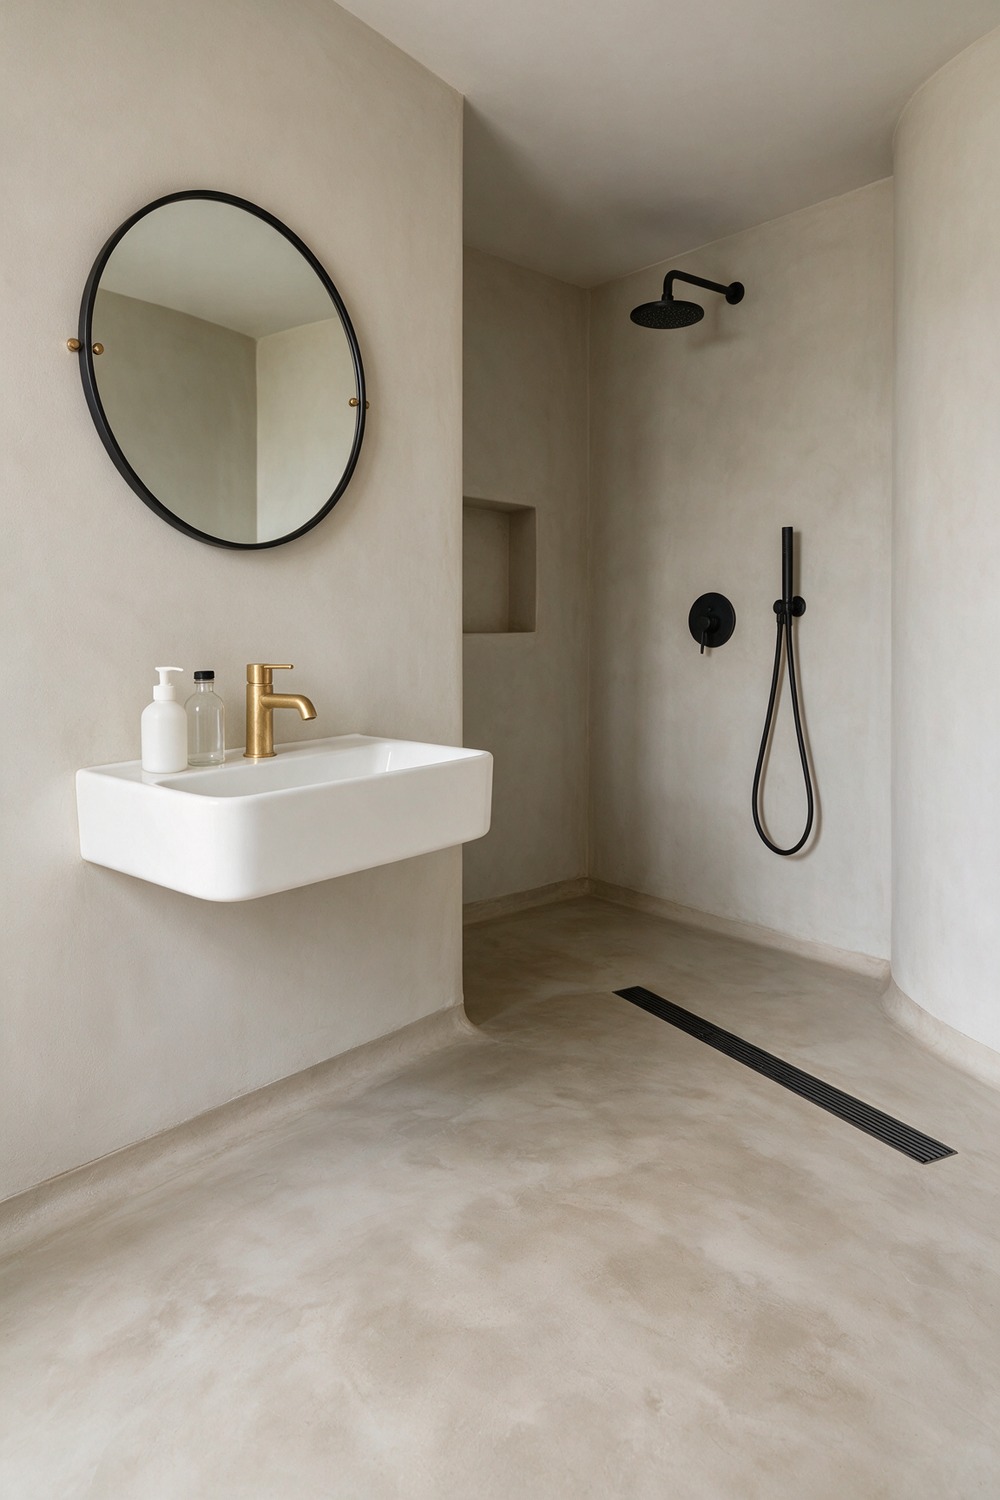
Start at your feet. A microcement floor is the easiest way to taste the material without recoating a whole room, and it is the one surface where the seamless trick pays off hardest.
I love a warm putty-grey floor, something close to Dulux Perfectly Taupe, troweled with faint cloudy movement so it reads handmade rather than flat. Underfoot it is smooth and slightly cool, with none of the cold shock of tile.
To get the look: keep the walls pale and matte, let the floor run wall to wall with a soft skirting curve, and pair it with a matte-black floor drain. Start with the floor, add everything else after.
2. Microcement Bathroom Walls
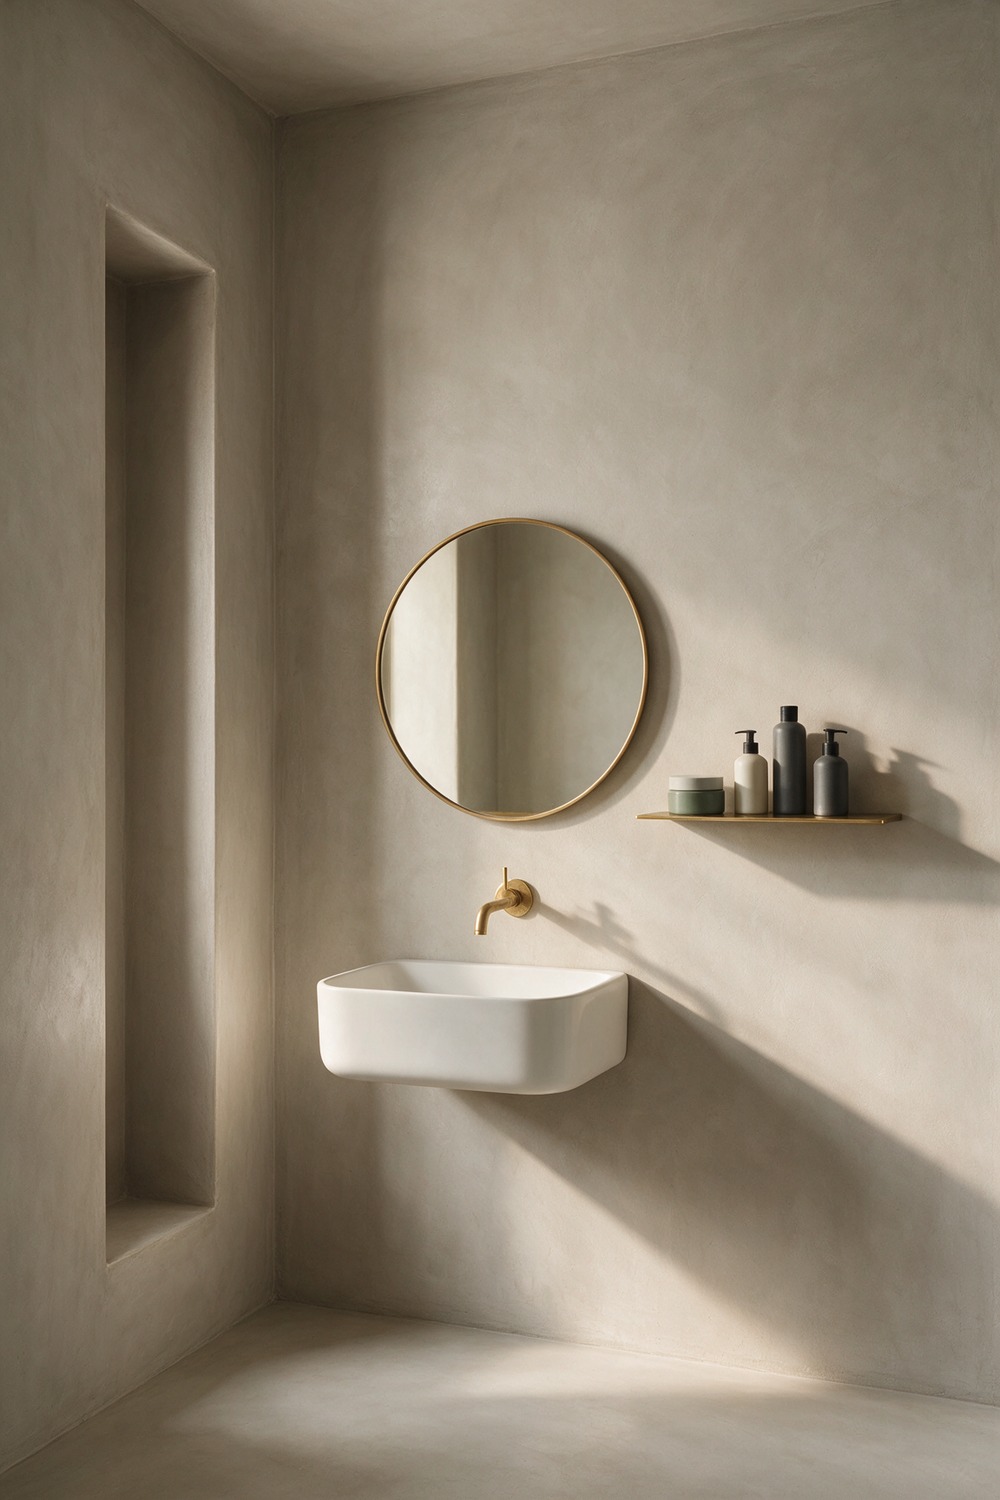
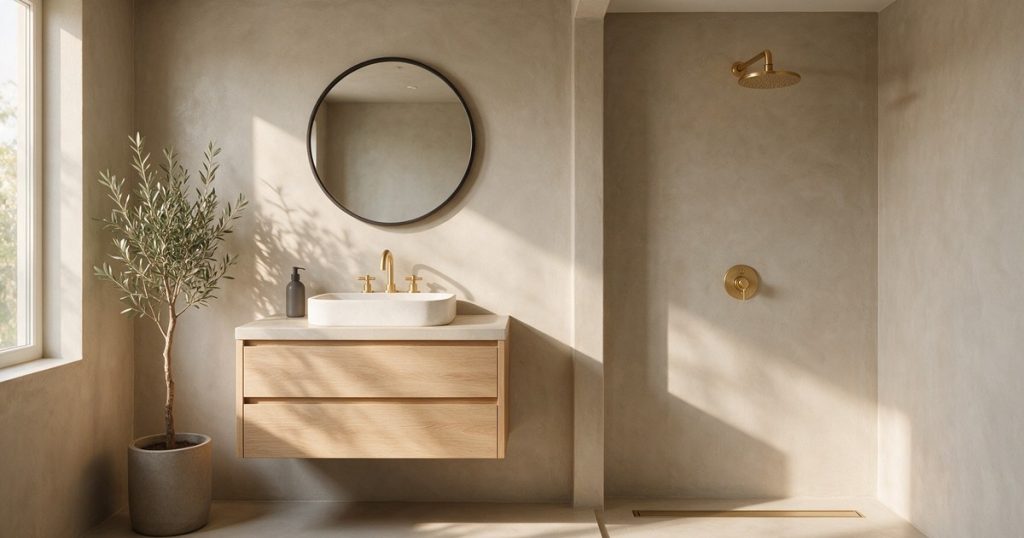
Here is where microcement stops being a floor finish and becomes the whole atmosphere. Walls in one unbroken plaster skin make a small room feel calm and a big one feel like a spa.
My pick is a chalky greige, the Goldilocks of neutrals, think Little Greene French Grey, catching light in soft gradients so the wall almost glows at the edges.
Pro tip: run the microcement into the shower too, properly sealed, so there is no tile line breaking the flow. Palette stays tonal, fixtures go unlacquered brass, and you begin with the largest wall and work outward.
3. Microcement Tile Bathroom
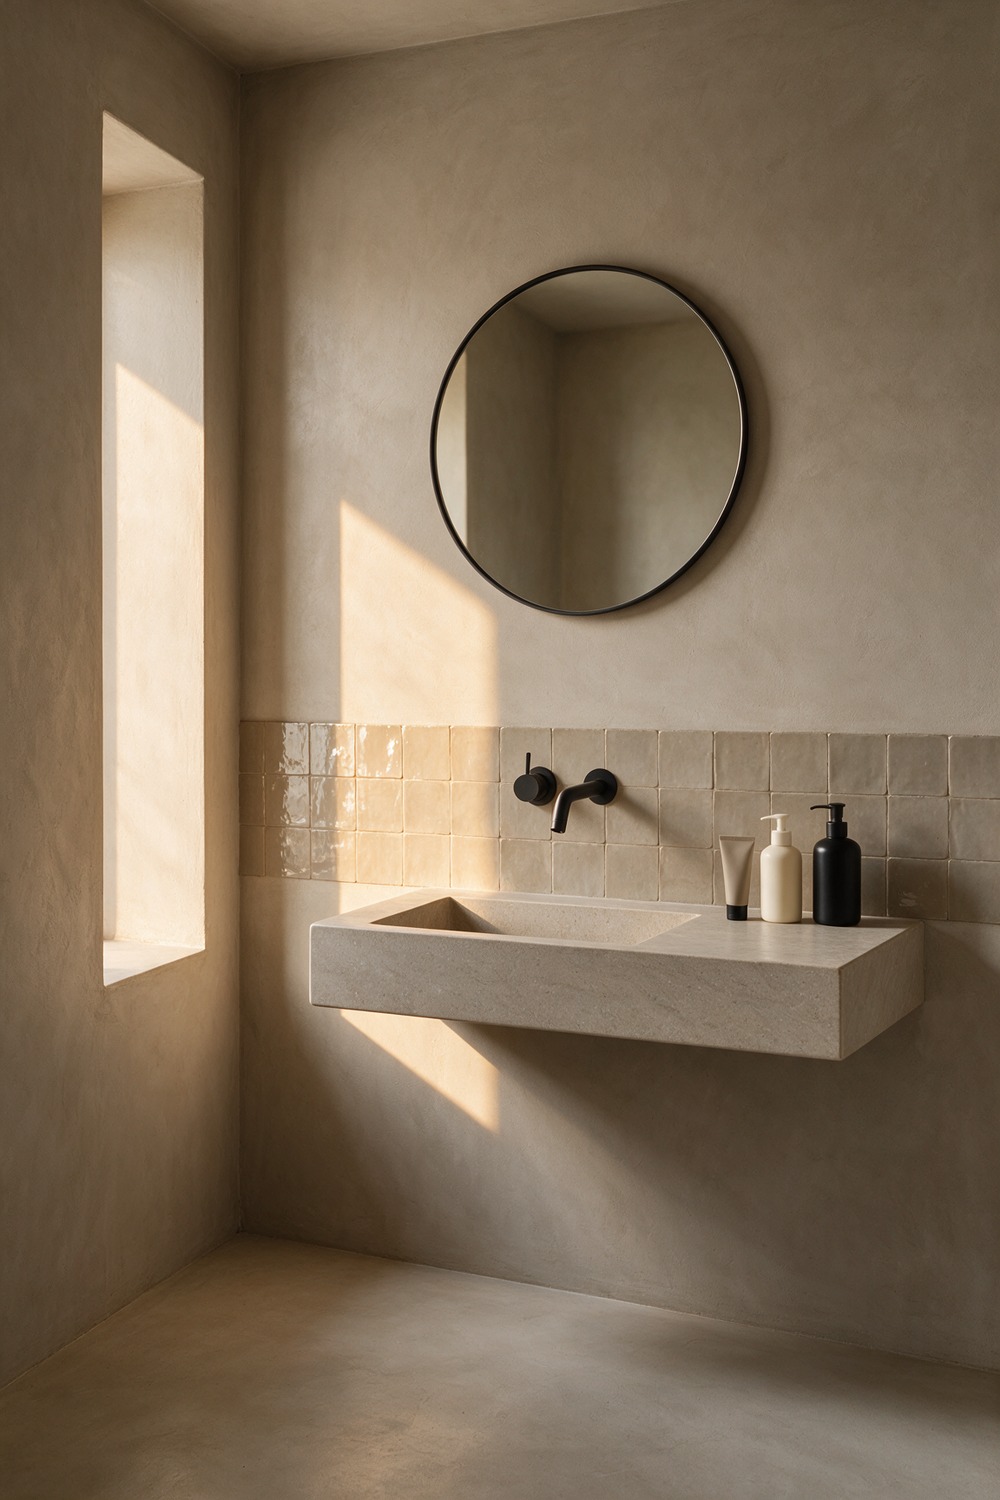
A little myth to bust. People assume microcement means no tile at all, but pairing a troweled plaster wall with one patch of real tile is where the material gets interesting.
Picture a seamless taupe microcement room with a single band of small square zellige behind the basin, the handmade glaze flickering against all that matte. The contrast of smooth and glossy is the point.
Get it by choosing a 2×2 tile in a tone one shade deeper than the plaster, keeping grout tight and colour-matched. Finish matte on the walls, glossy on the tile, and let the tile be the only shiny thing in the room.
4. Microcement Bathroom Sink
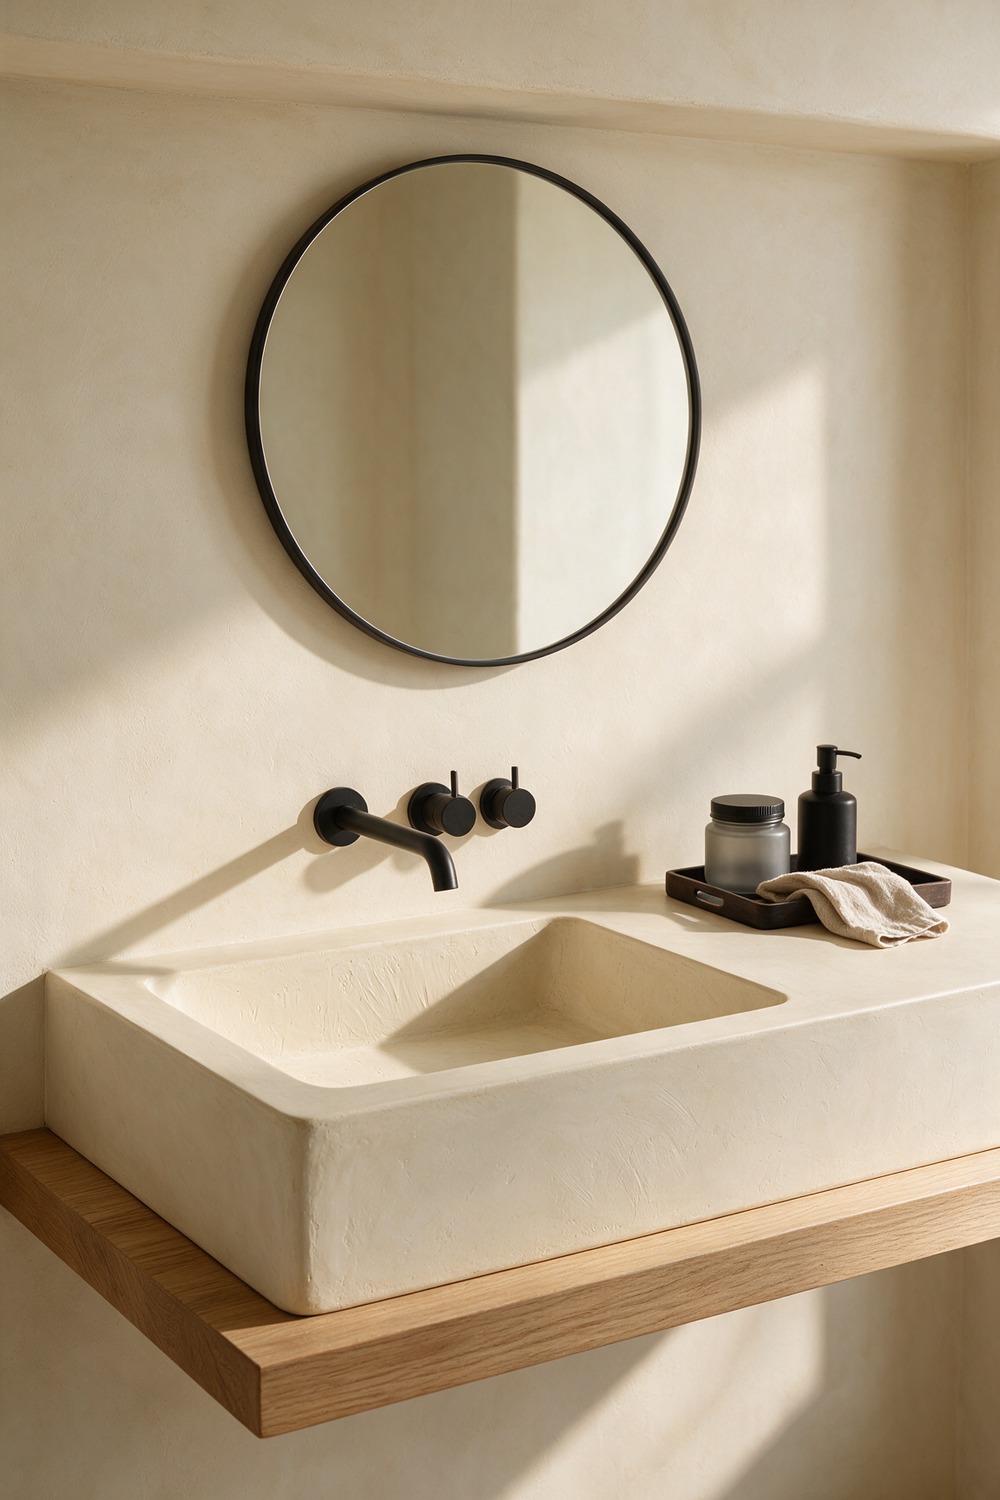
Would you plaster a sink? I would, and it is my favourite show-off move. A microcement basin formed as one piece with the counter looks carved from a single block of stone, here in warm ivory on a floating oak shelf.
Ask a specialist for a formed vanity top with an integrated basin, seal it with the right waterproof topcoat, and add a wall-mounted matte-black mixer. The sink leads, the vanity follows.
5. Microcement Marble Bathroom
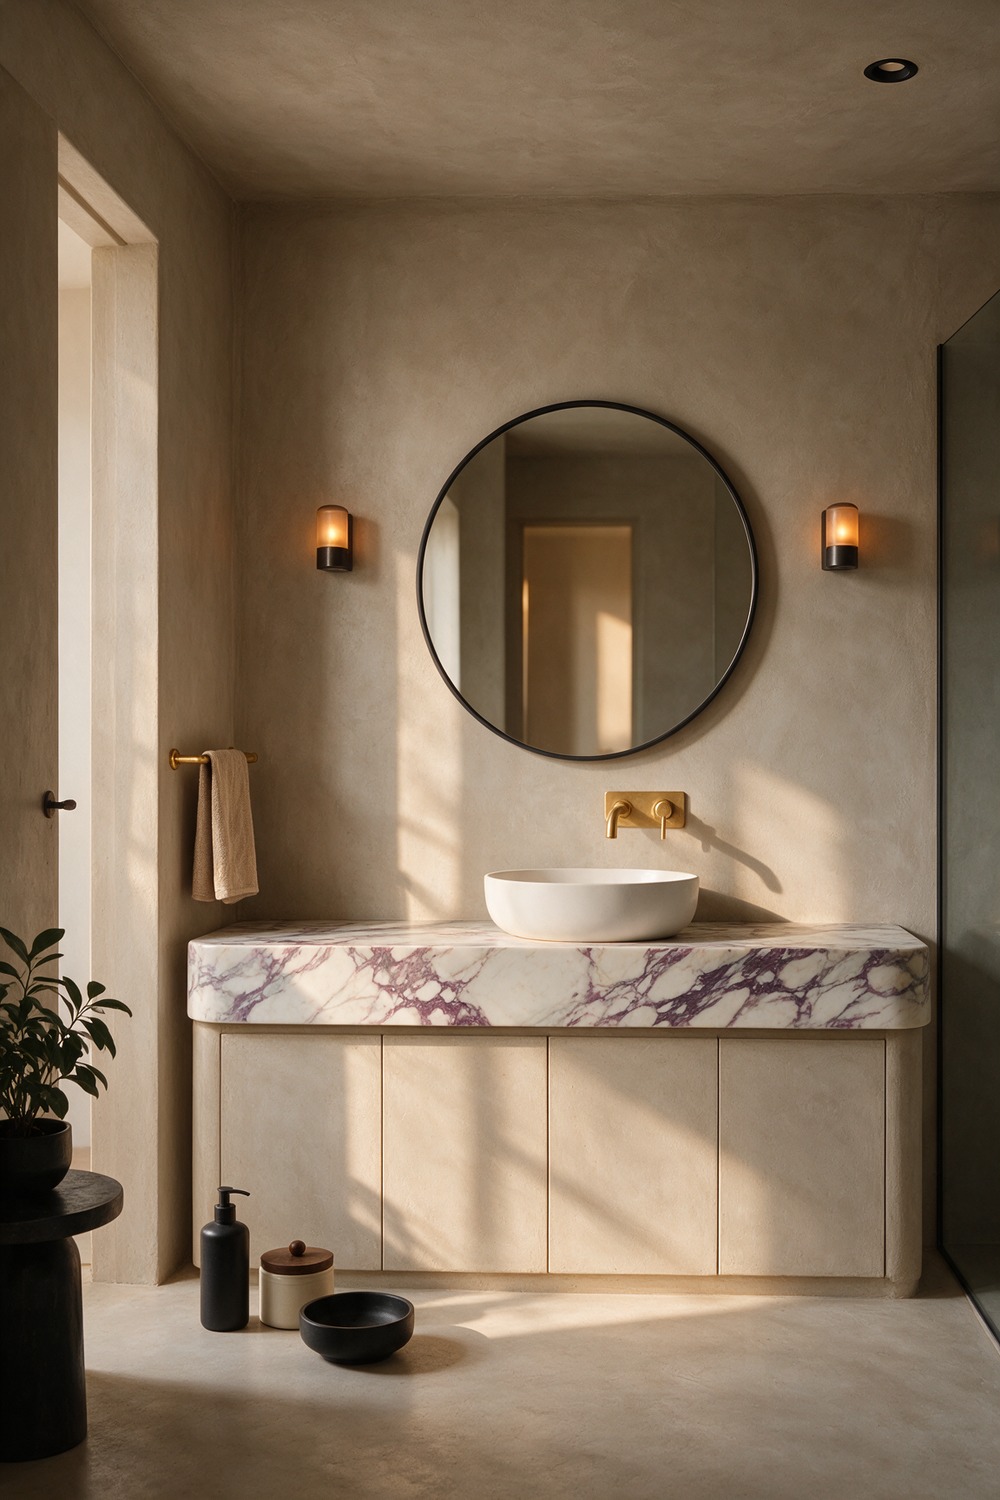
Pairing humble plaster with real marble sounds like a clash. It is actually the chicest tension in the room, the rough and the regal in one frame.
I would run warm greige microcement across the walls and floor, then drop in a single slab of honed Calacatta Viola, its plum veining doing all the talking.
Get the look with a stone-toned base like Benjamin Moore Pale Oak, one honed marble surface such as a shower bench, and warm brass taps. Begin with the marble, then plaster to its warmest vein.
6. Microcement Wood Bathroom
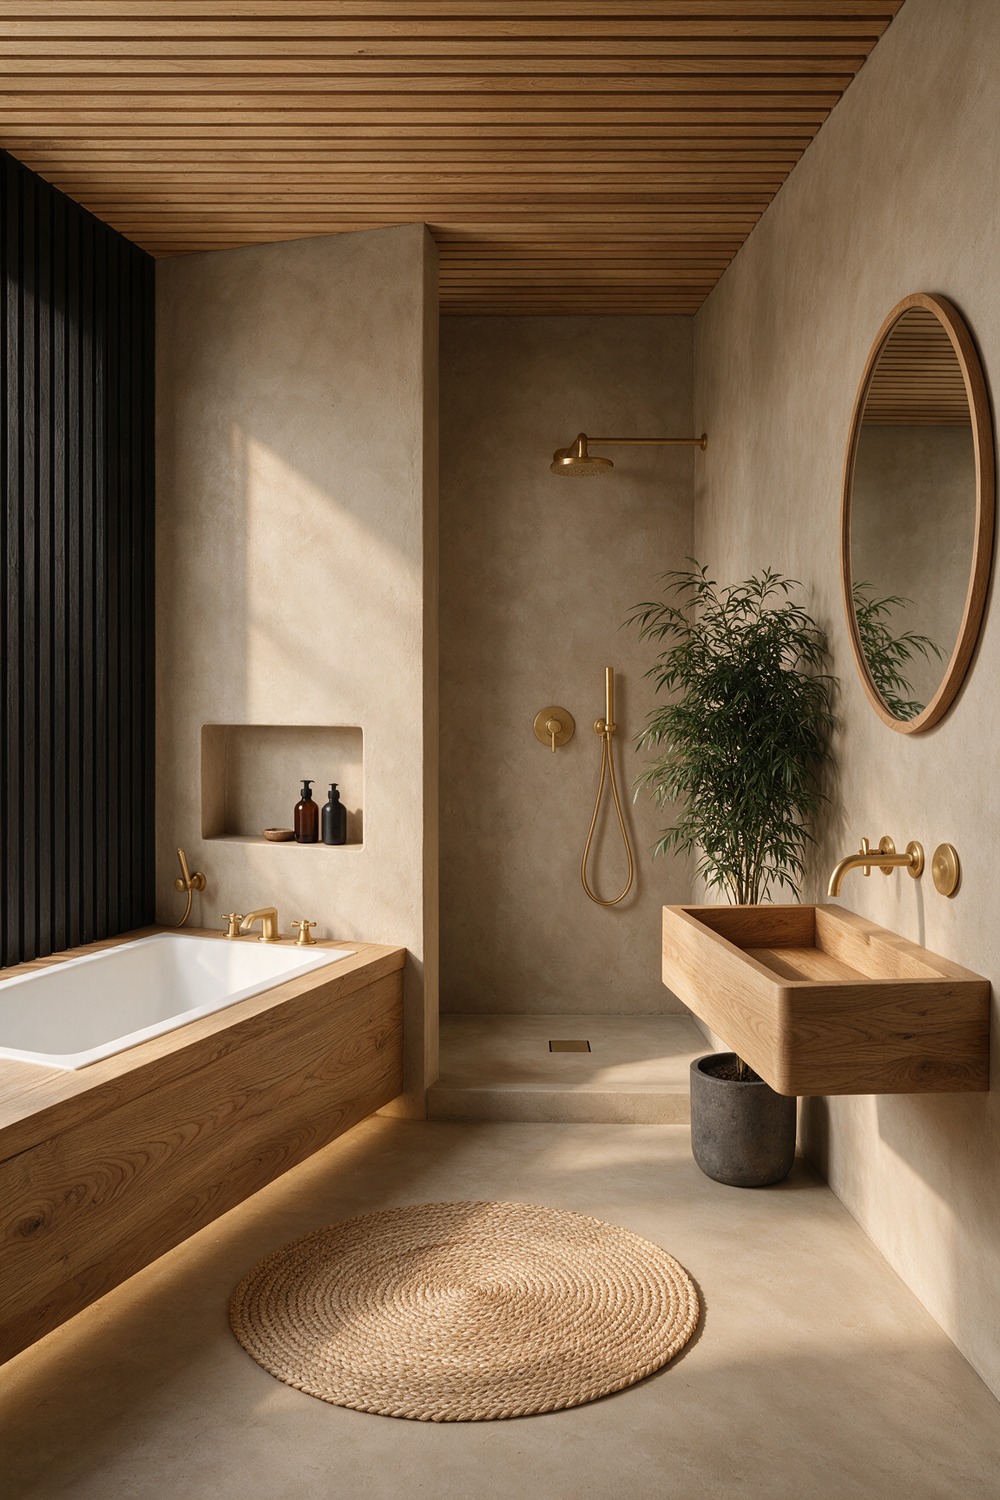
Texture does the heavy lifting here. Microcement and timber are a classic pairing: one matte and mineral, the other warm and grained.
Together they feel like a sauna you never want to leave. My version runs taupe plaster walls, a slatted oak ceiling, and a bath deck in solid oak sealed against splashes.
The warmth of the wood stops all that plaster from reading austere. There is a smell to it too, beeswax polish and sun-warmed oak, that no tile room ever manages.
To build it, choose oak with a natural oil finish, not a yellow varnish, keep the plaster in a sandy neutral like Bauwerk Limewash in Clay, and add one live plant. Start with the timber tone and plaster to flatter it.
7. Microcement Bathroom With Tub
There is a specific kind of hush that falls over a room when the tub is the clear hero.
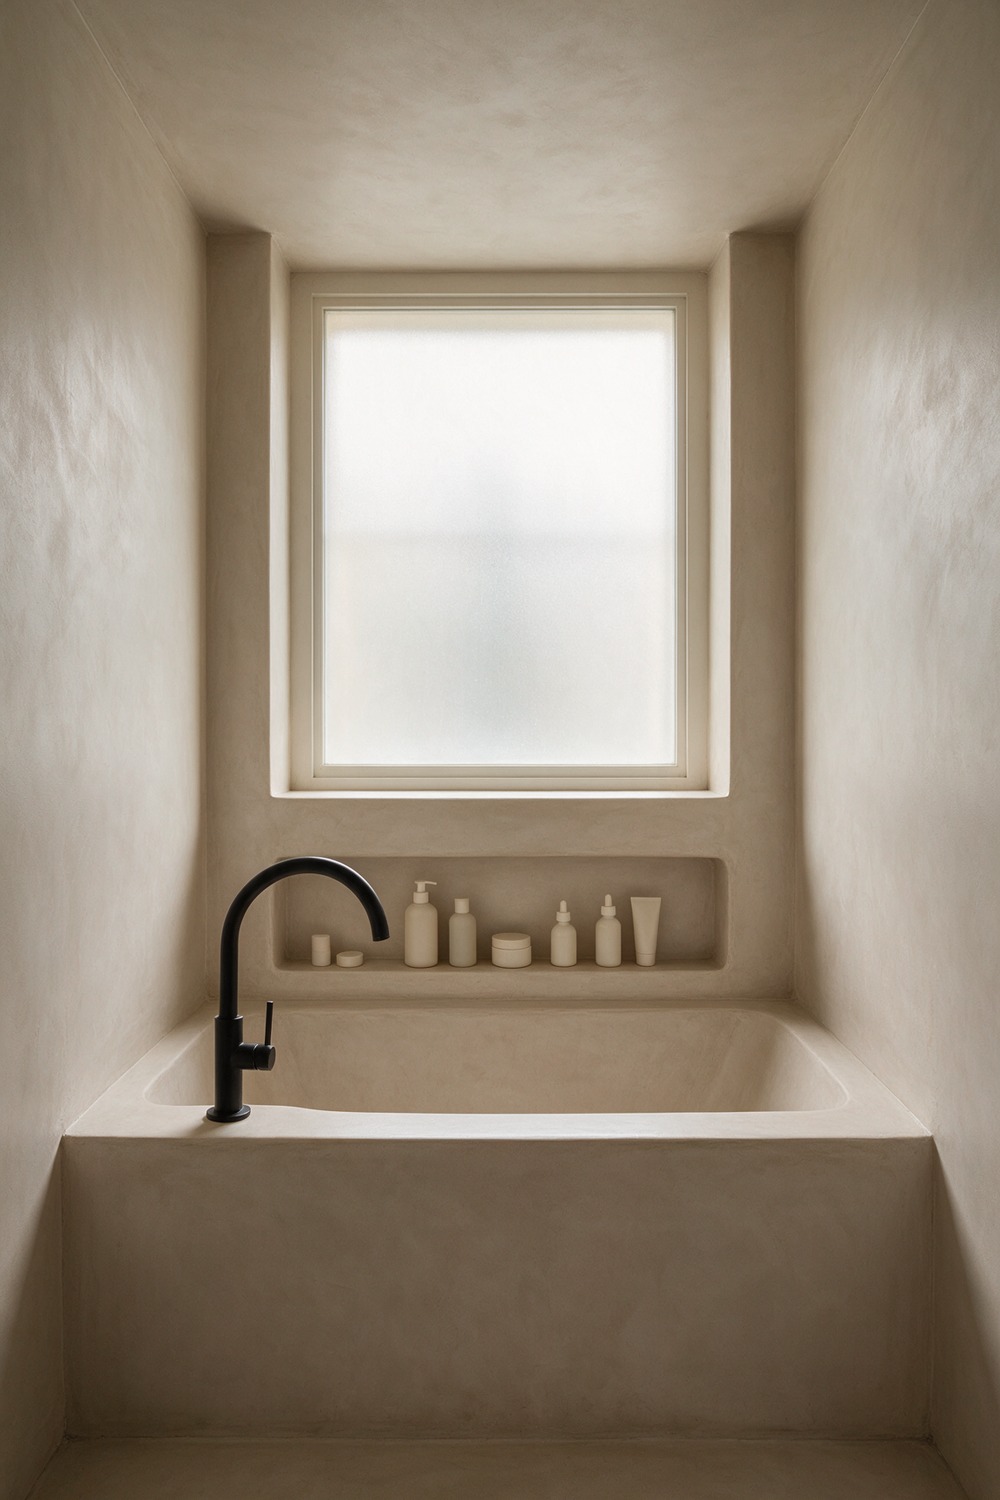
Microcement sets that stage better than anything, because it melts the walls away and leaves the bath centre stage. I picture a deep built-in alcove tub with a microcement surround and matching plaster walls in a soft mushroom tone.
A matte-black filler arcs over the rim from the tub deck, one material running floor to tub, uninterrupted. Fill it on a cold evening and the warm plaster seems to hold the heat in the room.
Recreate it tile-free: plaster the tub surround and walls in the same batch for a true colour match, pick a tone like Sherwin-Williams Accessible Beige, and keep the filler matte black. Start with the tub placement, plaster around it.
8. Microcement Terrazzo Bathroom
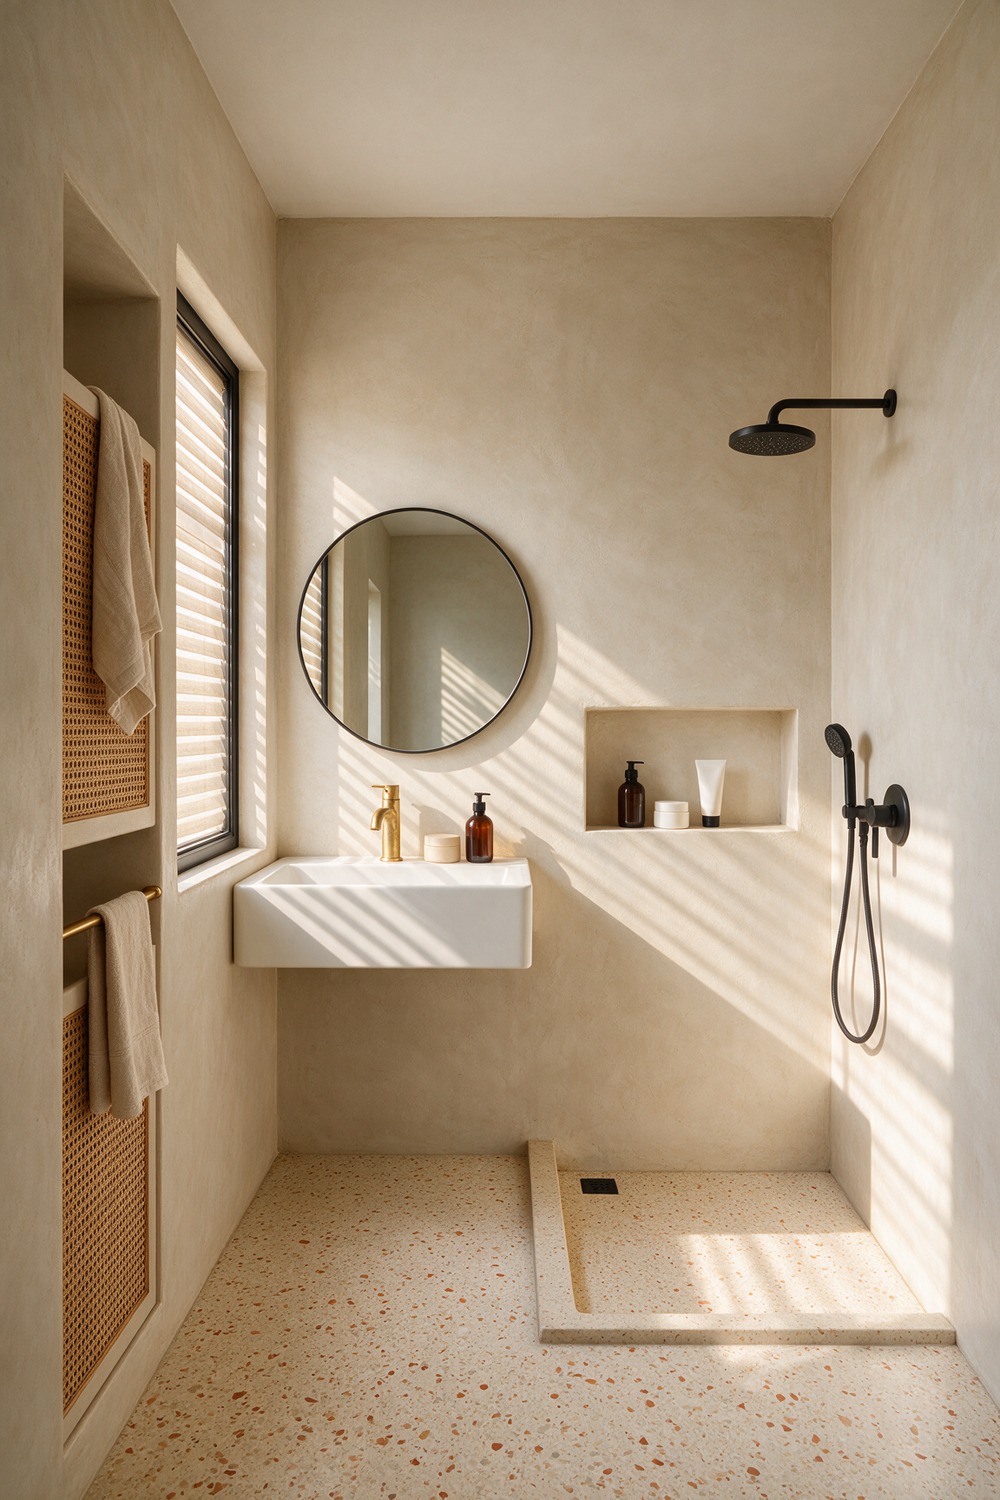
Here is the fun one. Terrazzo and microcement are cousins (both are poured, both are seamless), so letting a flecked terrazzo floor meet plain plaster walls feels completely natural.
A soft terrazzo floor with warm cream chips and the odd terracotta fleck, meeting walls of plain oat-coloured microcement. The floor brings the confetti, the walls keep it grown-up.
To get it: choose a fine-chip terrazzo in warm neutrals (not bold primaries), plaster the walls in an oatmeal tone close to Clare Current Mood, and echo one chip colour in the towels. Lay the terrazzo first, then plaster to its base shade.
9. Small Microcement Bathroom
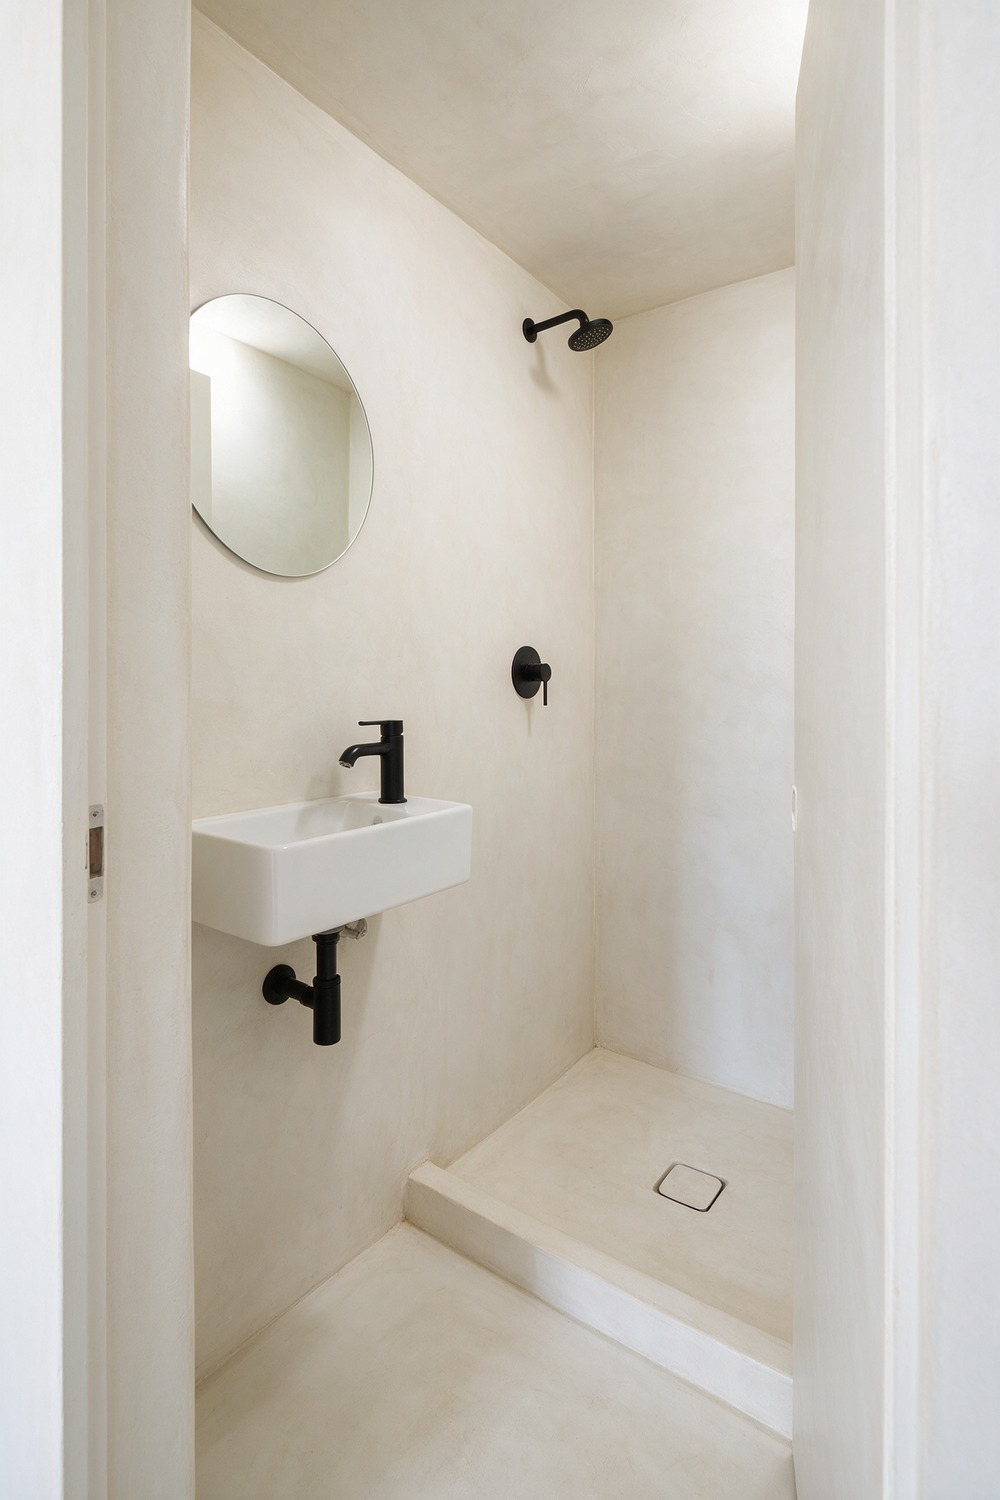
Small bathrooms are where microcement truly earns its keep. No grid of grout lines chopping the space into squares means the eye glides, and the whole room reads bigger than its footprint.
The trick is to run the exact same plaster shade on floor and walls so the corners dissolve. Keep it light, think Behr Swiss Coffee, add a slim wall-hung basin and a frameless open shower, and start with the lightest tone you can live with.
10. Modern Microcement Bathroom
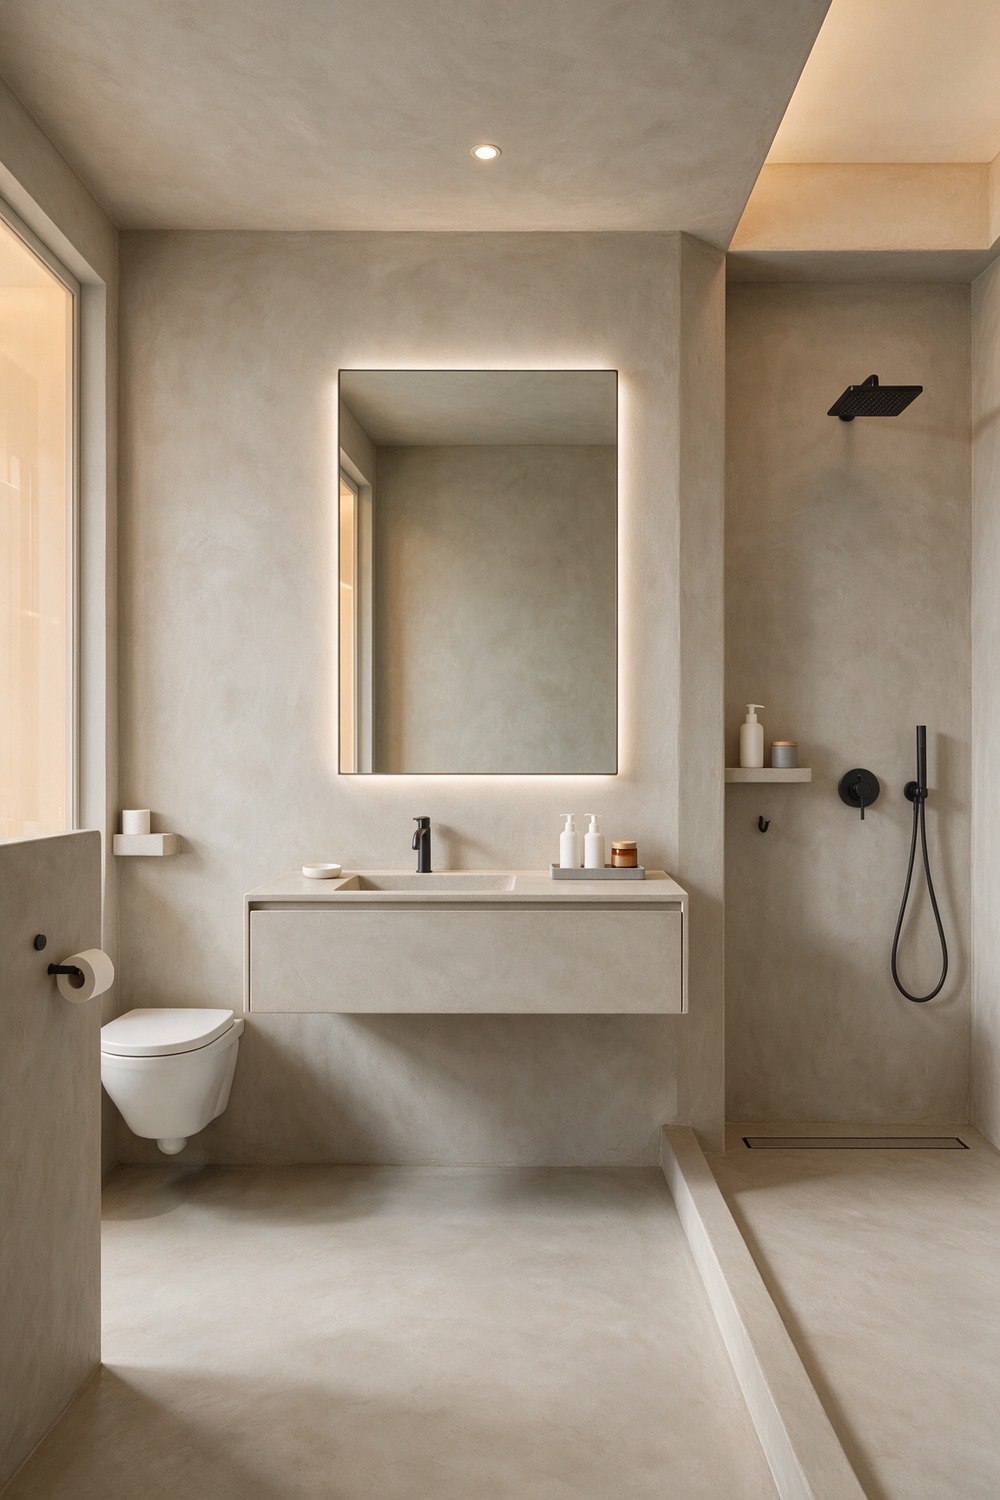
Modern does not have to mean cold. The version I love leans warm-minimal: greige microcement across walls and floor, a long floating vanity, a single rectangular mirror with hidden lighting, and matte-black everything. Straight lines softened by that cloudy hand-troweled finish.
Get the look with a tonal greige like Backdrop Mull It Over, a wall-hung vanity in matching plaster or pale oak, and black tapware. Keep the palette to two tones and let the plaster add the warmth.
11. Microcement Bathroom Walk In Shower
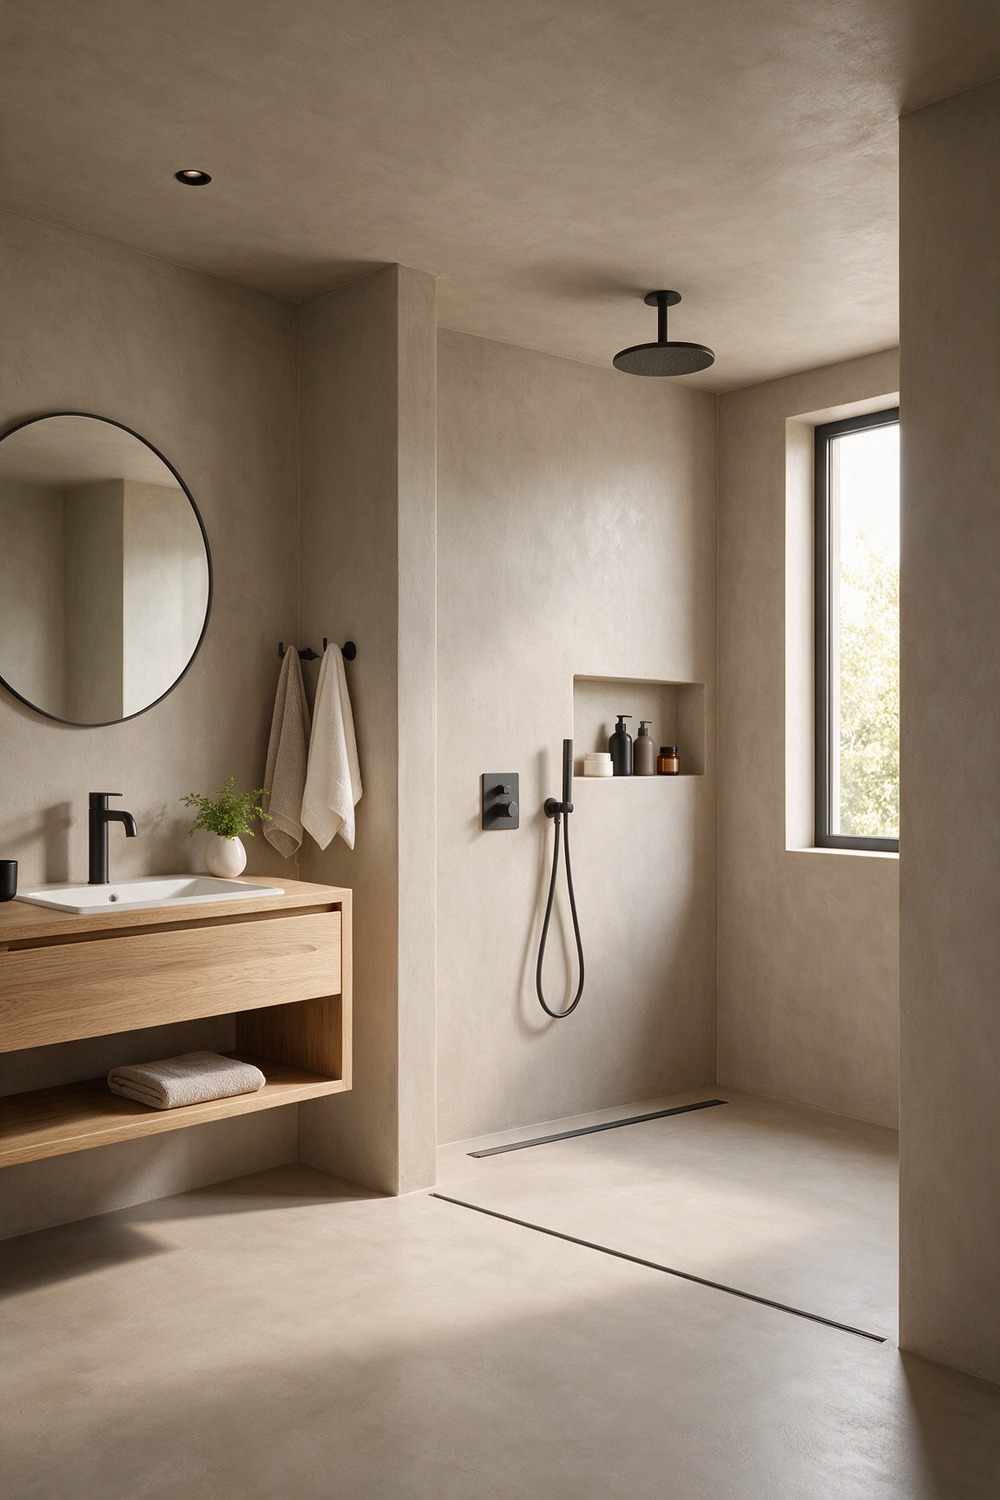
A walk-in shower is where seamless plaster goes from nice to necessary. No grout, no mouldy corners, just one continuous waterproof wall you can wipe down in seconds.
My ideal is an open walk-in with no glass, plaster walls and floor flowing straight in, a ceiling rain head, and a matte-black wall valve.
A recessed niche holds the bottles so nothing clutters the ledge. The shower zone simply is the room, no box, no screen.
To recreate: seal the microcement with the proper wet-area topcoat, slope the floor to a linear drain, pick a warm taupe like Dulux Egyptian Cotton, and start with the drain line so the fall is right before you plaster.
12. Microcement Wet Room Bathroom
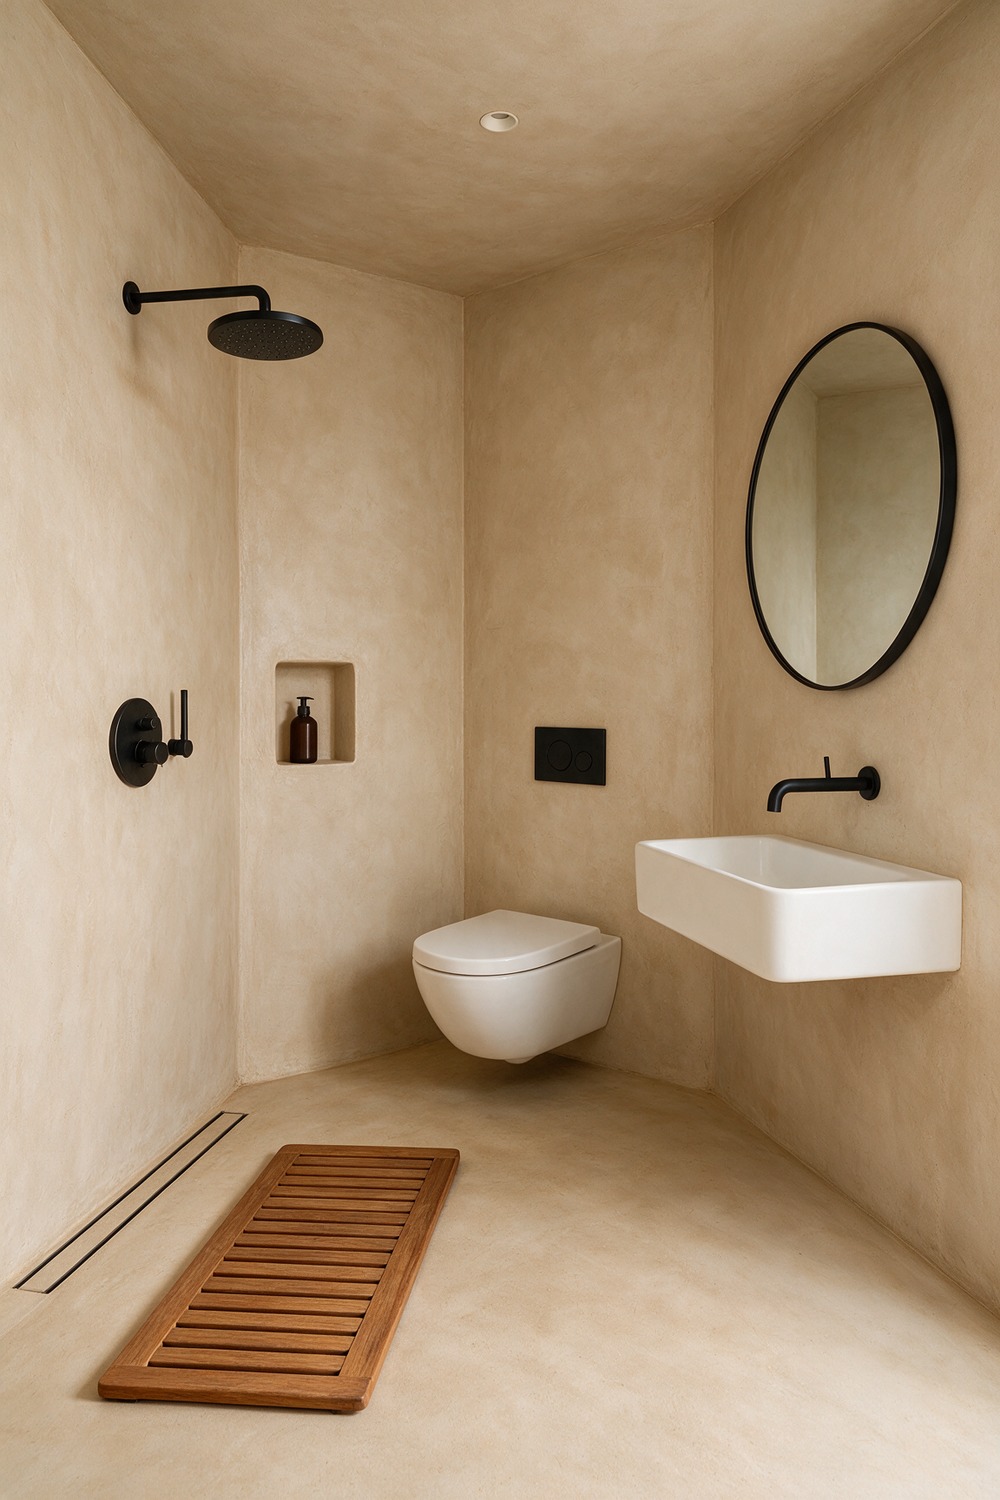
A wet room (the whole bathroom tanked and waterproof so the shower has no enclosure at all) is microcement’s natural home. One sealed shell, water free to go anywhere, the floor gently falling to a drain.
I would keep it monastic and lovely: warm sand plaster over every surface, a single rainfall shower, a wall-hung loo, a slatted teak mat. Nothing here fears a splash.
Get it by tanking the room fully before the microcement goes on, choosing a sand tone like Farrow & Ball Oxford Stone, adding one slatted teak mat, and starting with the waterproofing (never skip it, this is the one step a pro must own).
13. Microcement Freestanding Tub Bathroom
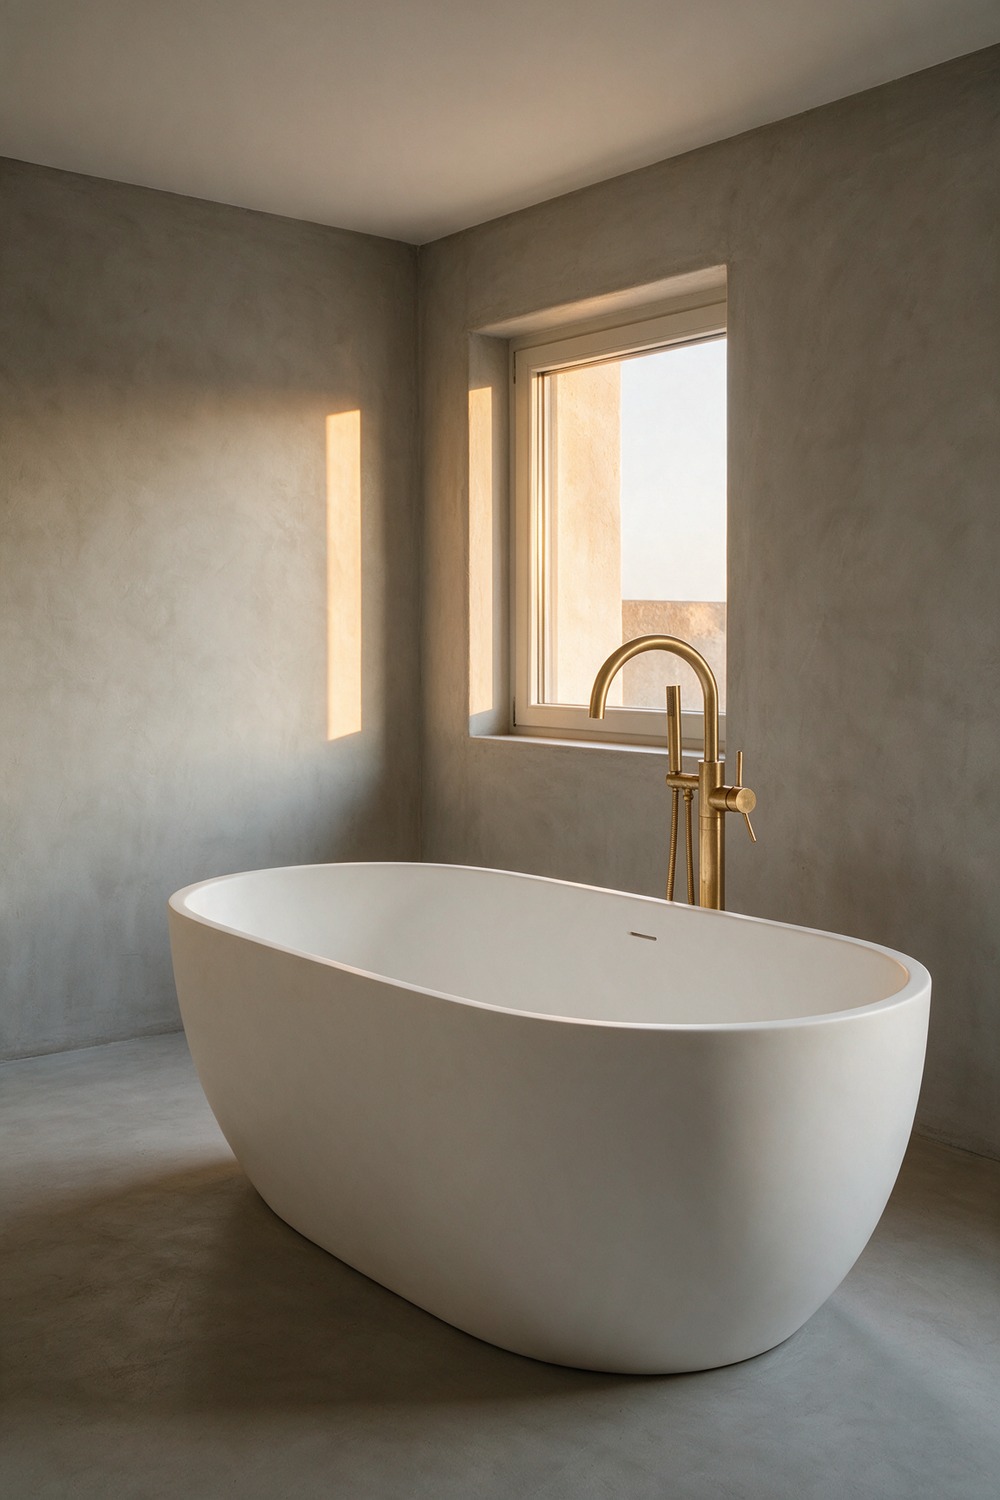
Give a freestanding tub a plaster backdrop and it stops being a fixture and becomes sculpture. A smooth stone-grey microcement wall, a rounded white tub, a brushed-brass floor filler beside it. The room holds its breath around the shape.
Plaster the backdrop in a mid-grey like Little Greene Scree, keep the tub a simple organic curve, and leave generous space around it. Place the tub first, plaster behind it.
14. Microcement Floating Vanity Bathroom
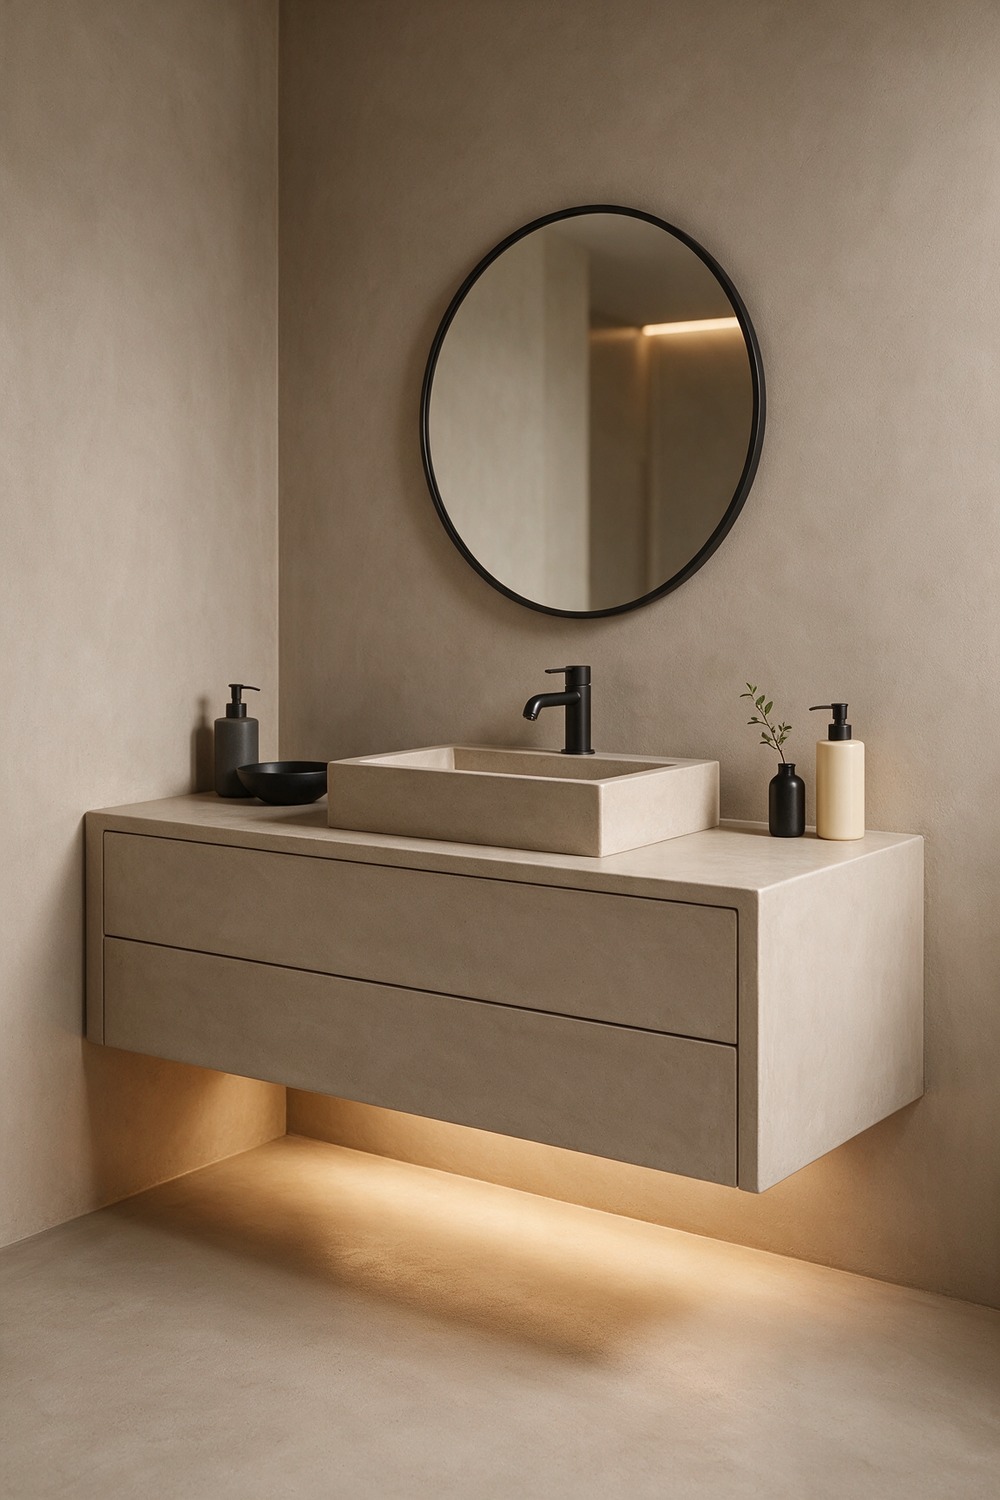
If you want one detail that makes a bathroom feel custom, float the vanity. Wall-hung and wrapped in plaster, it looks like it grew out of the wall itself.
I picture a chunky floating vanity clad entirely in warm greige microcement, matching the walls so it almost disappears, a countertop basin on top, and soft light washing the floor beneath it. The float makes the floor feel endless.
Recreate it by having the vanity cabinet plastered in the same batch as the walls, mounting it high enough to see floor underneath, adding a stone vessel bowl, and matching tapware to the bowl. Start with the vanity height, everything reads off it.
15. Microcement Double Vanity Bathroom
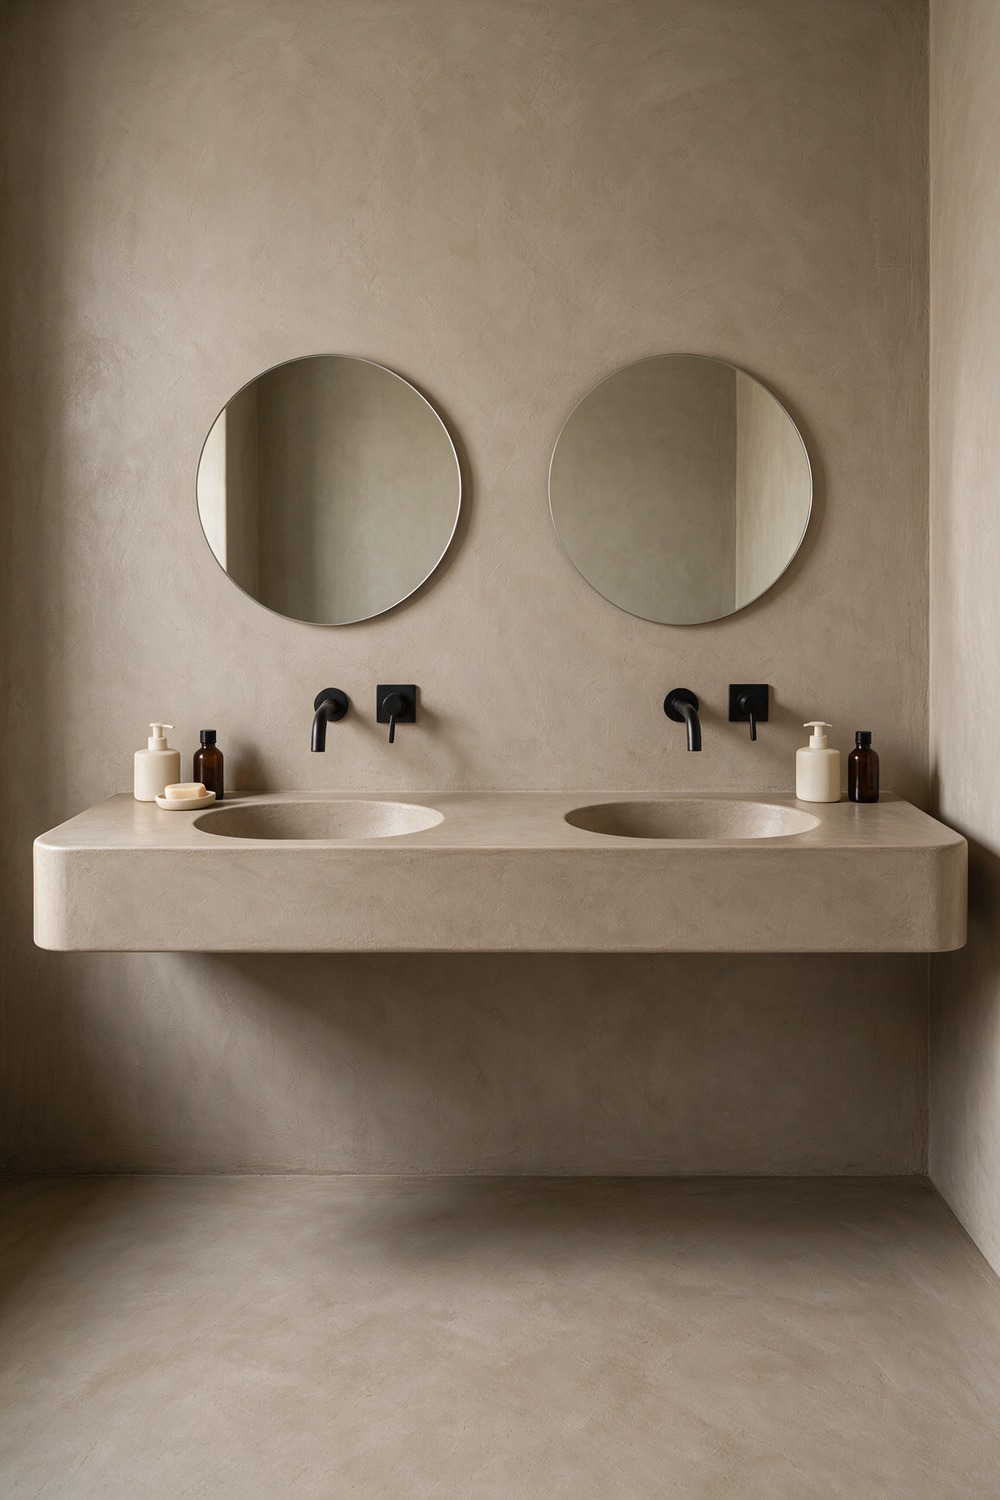
For a shared bathroom, a double vanity is the peace treaty, and microcement makes it feel like one considered piece rather than two sinks bolted together.
My take: a long floating double vanity in taupe plaster, two integrated basins formed into the top, twin round mirrors, and a pair of matte-black wall taps. Symmetry, softened by that handmade surface.
Get it with a single continuous plastered vanity top holding two moulded basins, two mirrors spaced evenly, a warm taupe like Sherwin-Williams Agreeable Gray, and wall-mounted taps to keep the counter clear. Set the two basin centres first, then build out symmetrically.
16. Minimalist Microcement Bathroom
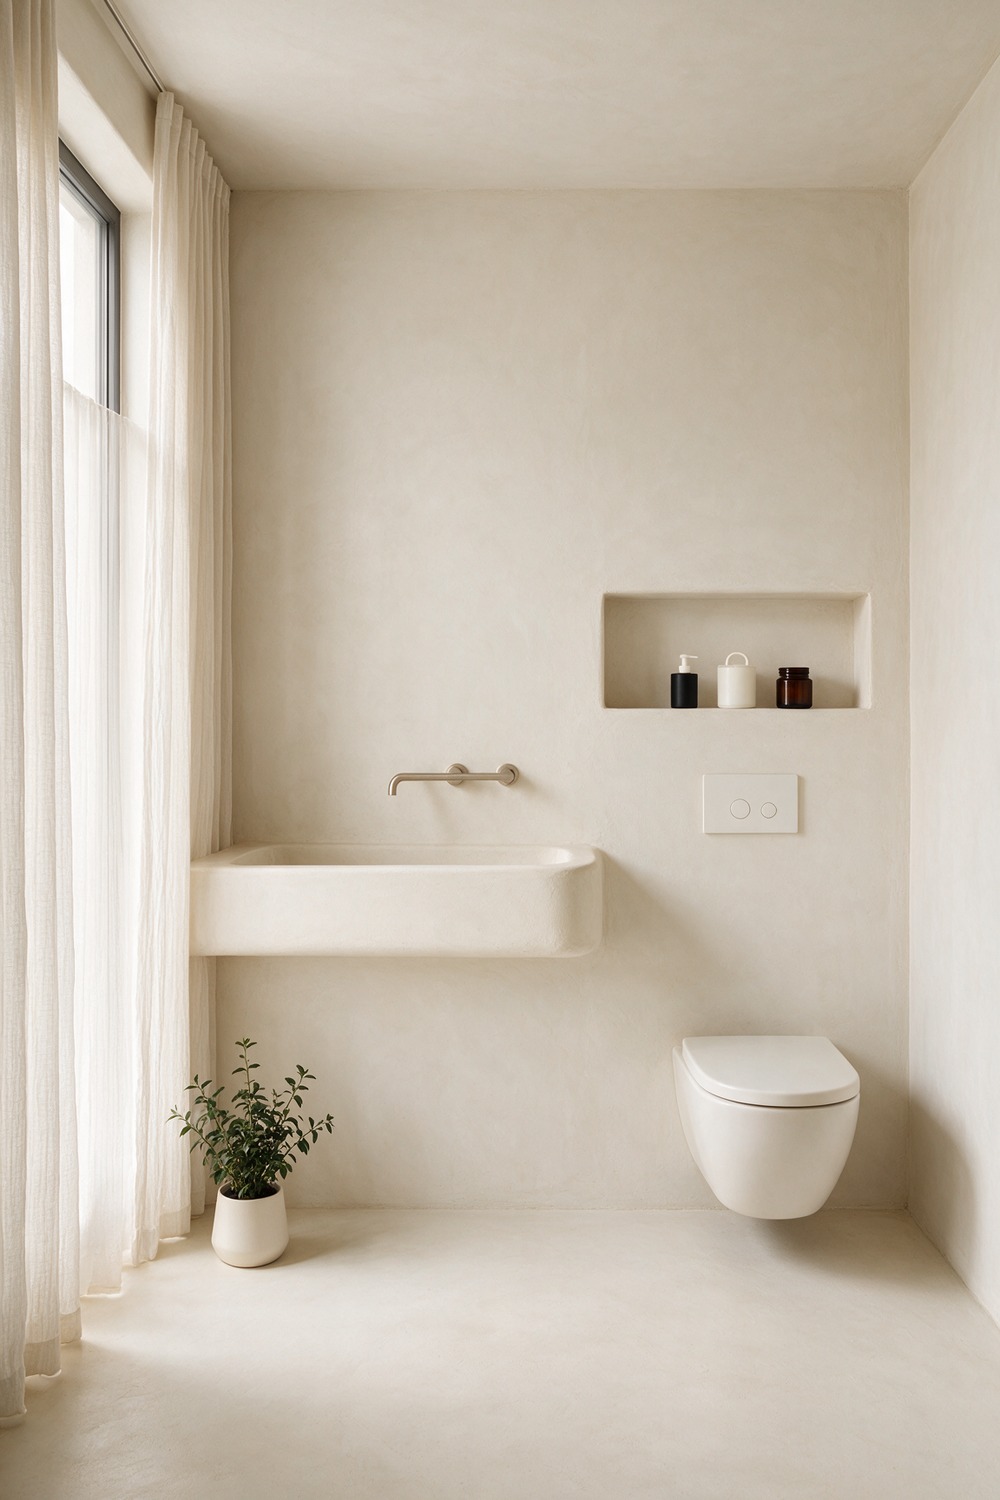
Minimalism and microcement were made for each other. When there is almost nothing in a room, the surface becomes the whole story: an off-white plaster with the faintest warmth, a single trough basin, a hidden-cistern loo, and no handles you can see. Nothing shouts, and nothing is missing.
To recreate it: pick a warm white like Clare Whipped, run it on every surface, choose push-to-open storage and concealed fixtures, and keep exactly one plant. Start by removing, not adding, then plaster what remains.
17. Spa Microcement Bathroom
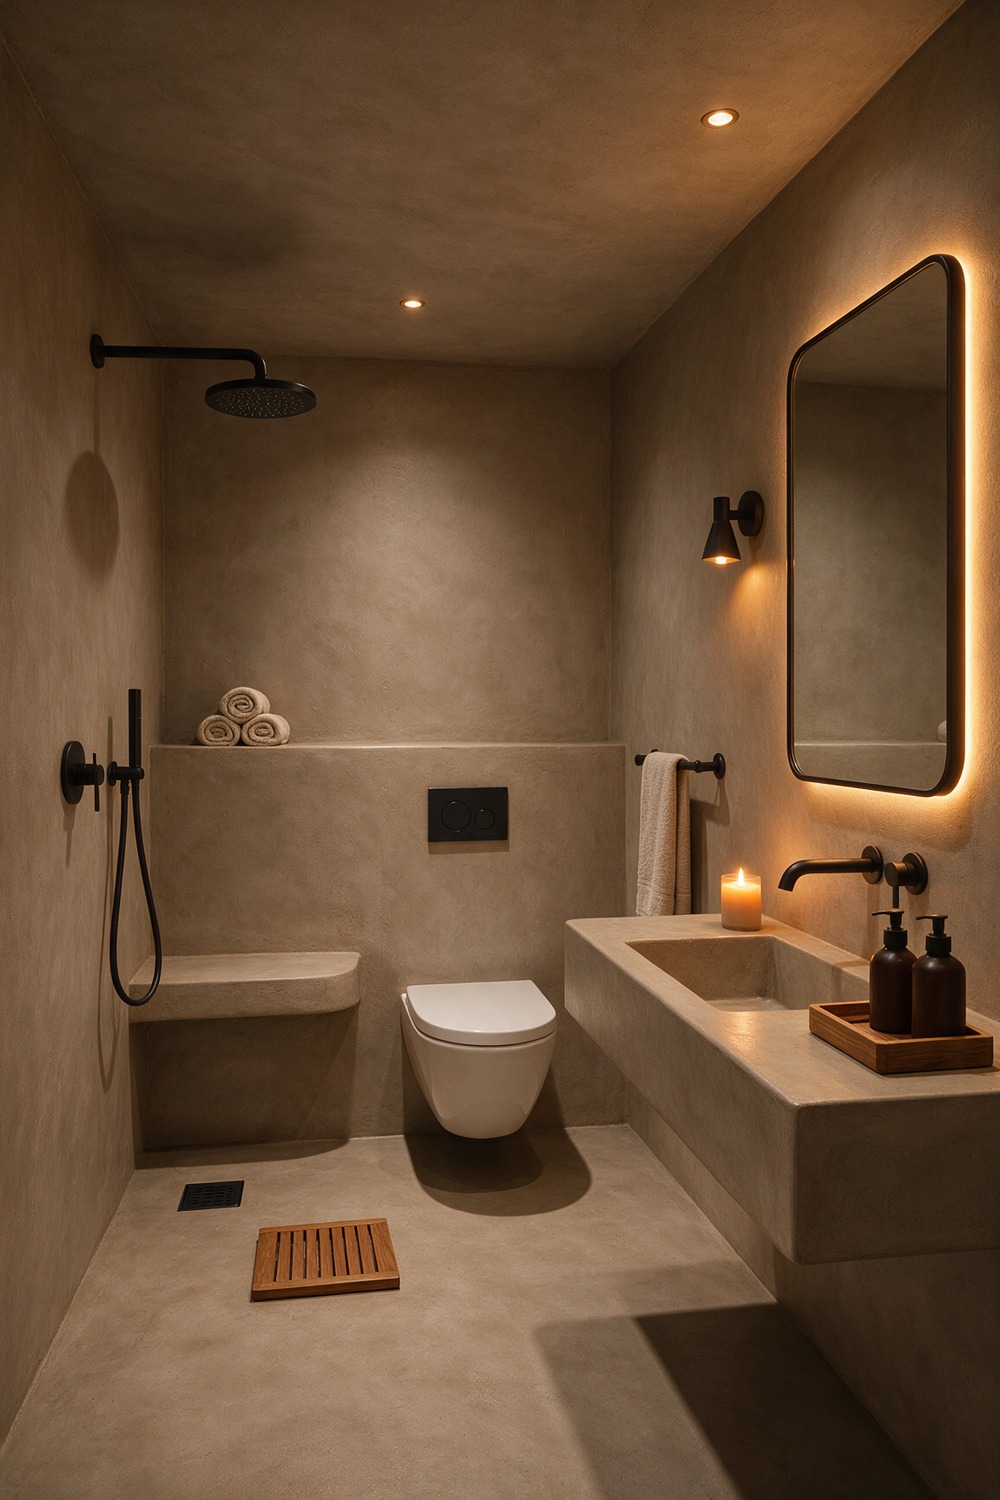
You know the drop in your shoulders when you walk into a good spa. That feeling is almost entirely about seamless, warm, enveloping surfaces, which is to say it is almost entirely microcement.
My spa room runs warm mushroom plaster floor to ceiling, with a built-in bench in the walk-in shower and a rainfall head overhead.
Dimmable warm light at 2700K and a stack of rolled linen towels finish it. It is the kind of warm you sink into and forget the time.
Get the look with a greige-brown like Benjamin Moore Thunder, a plastered shower bench, warm low lighting, and teak accents. Begin with the lighting temperature, because spa warmth lives in the glow as much as the walls.
18. Japandi Microcement Bathroom
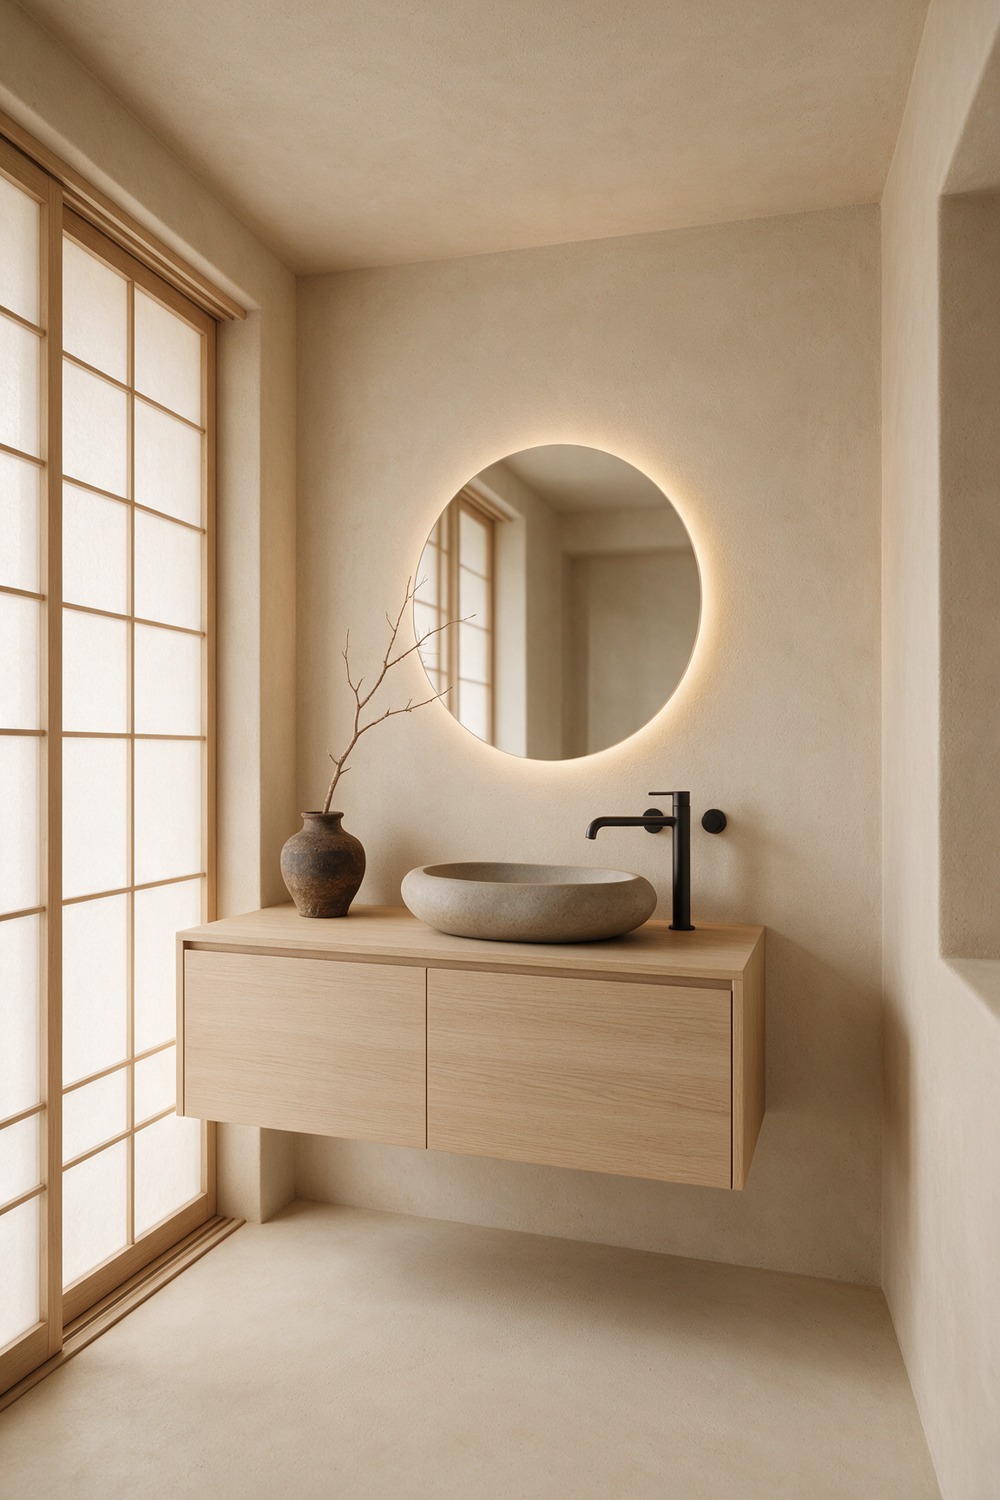
Japandi (Japanese calm meeting Scandinavian warmth) and microcement is my current obsession. Both prize natural materials, quiet palettes, and the beauty of a surface that looks hand-touched.
I would do pale oat plaster walls, a low pale-oak vanity, a round backlit mirror, a stone basin, and a single branch in a ceramic vase. Warm minimalism with soul, nothing shiny, nothing loud.
To recreate it: keep the plaster warm and light, like Little Greene Slaked Lime, pair with pale oak and matte-black slimline taps, and add one wabi-sabi ceramic. Start with the oak tone and plaster a half-shade warmer.
19. Rustic Microcement Bathroom
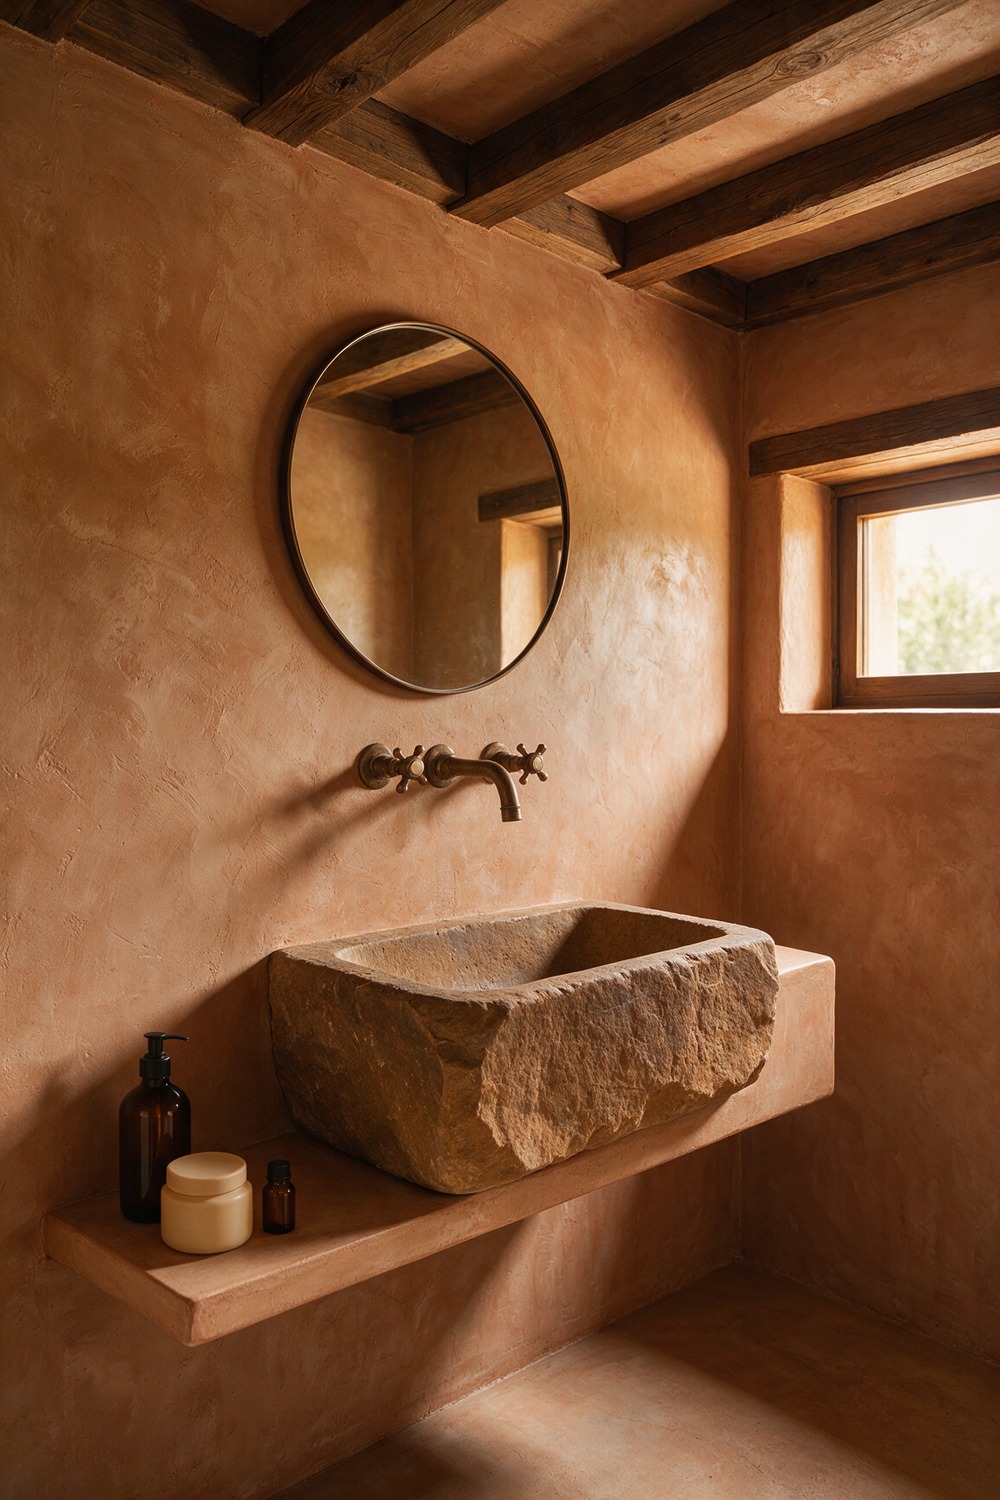
Microcement can go rustic without going farmhouse-kitsch, and that balance is harder to find than it looks. The trick is letting the plaster keep its rough, cloudy, imperfect hand.
My rustic room: a terracotta-tinged plaster with visible trowel movement, exposed timber beams overhead, an aged-brass basin tap, and a stone trough sink. Earthy, warm, a little weathered on purpose.
Get it by choosing a warm clay tone like Bauwerk Terra, leaving the trowel marks proud rather than sanded flat, adding reclaimed oak and unlacquered brass that will patina. Start with the clay pigment, then let the imperfection stay.
20. Microcement Ensuite Bathroom
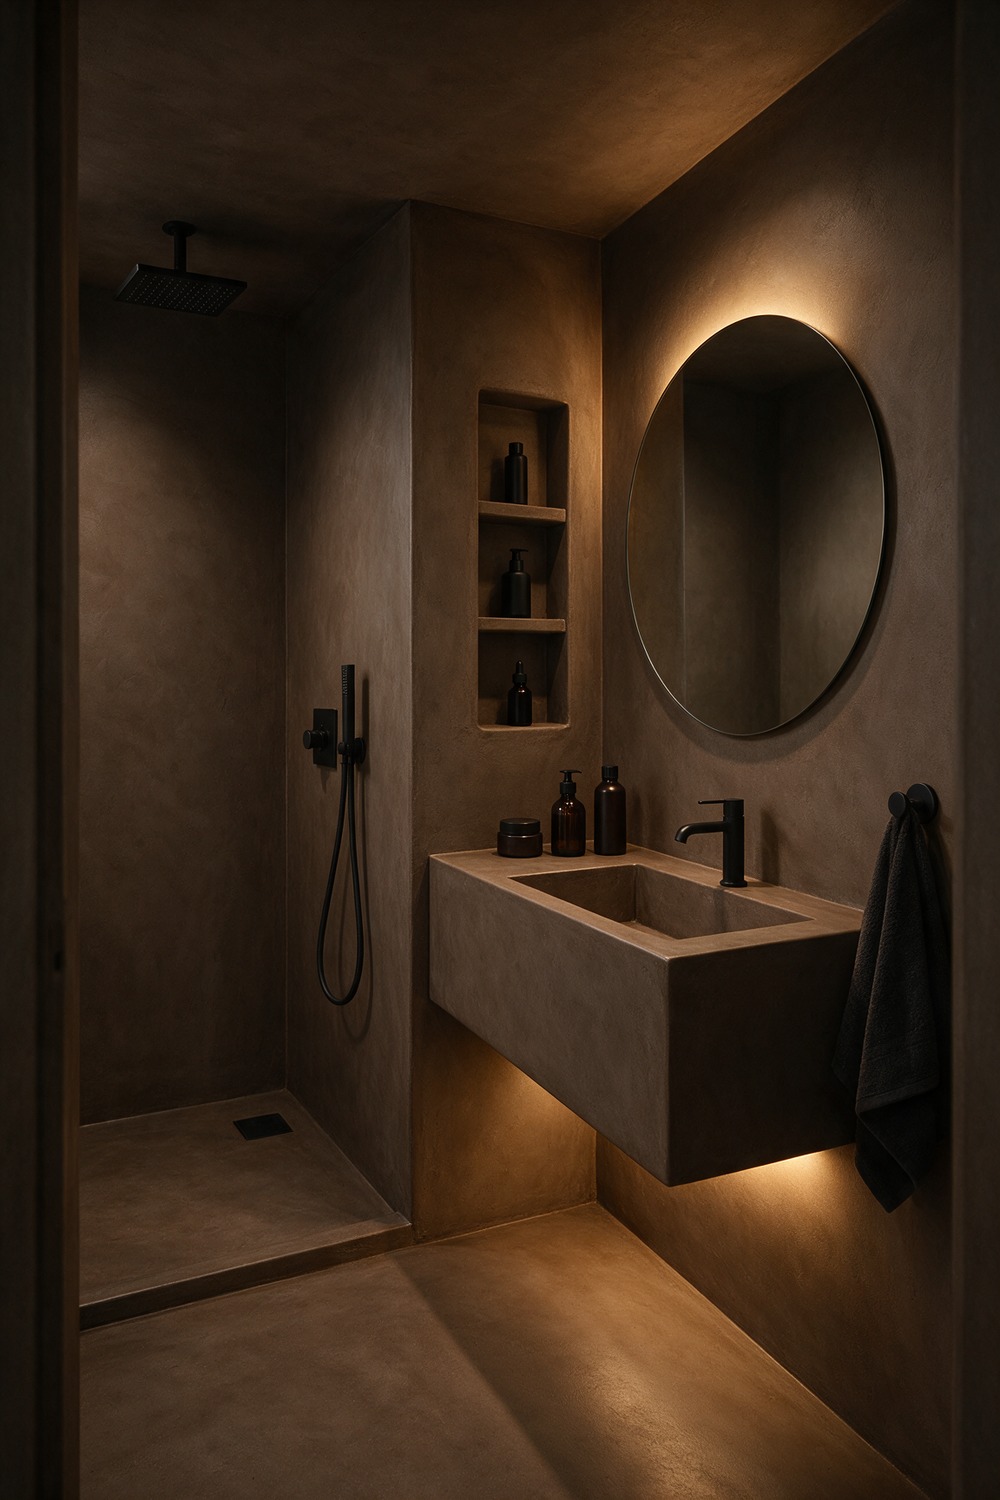
An ensuite is a small, private room you pass through every day. That makes it the perfect place to be a little bold with an all-over plaster finish you would hesitate to commit to in a main bathroom.
I love a moody one: deep taupe-brown microcement on every surface, a compact walk-in shower, a floating vanity.
Warm hidden lighting makes the plaster glow at night, and the whole room turns small and enveloping, a little bit luxurious. It is the one space where going dark feels like a reward, not a risk.
To recreate it, go darker than you dare, something like Farrow & Ball London Clay in plaster form, keep fixtures matte black, and tuck lighting under the vanity and mirror. Start with the darkest wall to test the mood before committing the room.
Which Microcement Bathroom Style Is Right for You
Start with the room you actually have. A tiny bathroom or ensuite wants one pale tone run everywhere so the corners vanish; a generous room can carry a hero tub or a slab of marble against the plaster.
Then choose by feeling. If you want calm, go japandi or minimalist in warm oat and pale oak. If you want to exhale, build the spa version with mushroom plaster and low 2700K light.
If you want character, go rustic with clay pigment and proud trowel marks, or moody with a deep all-over ensuite.
My one rule: pick your tone first and let everything else answer to it. Microcement is the backdrop the whole room reads against, so if the plaster is right, the rest falls into place almost on its own.
Microcement Bathroom Ideas, Answered
Is a microcement bathroom expensive? It sits in the mid-to-splurge band. The material is not the costly part, the skilled hands are, because a good finish is all in the troweling and the waterproof sealing. You pay for the applicator, not the bucket.
Can I do microcement myself? A small floor or feature wall is a doable weekend DIY with a kit and patience. A full wet room is a job for a pro, since the waterproofing underneath must be perfect. Rule of thumb: DIY the dry zones, hire out the wet ones.
How long does it take? Roughly a week for a full bathroom once the room is prepped: several thin coats, each needing to cure, then the sealing. It is not a same-day finish, but there is no tiling, grouting, or drying grout to wait on either.
What should I spend on? The sealer and the application. A premium waterproof topcoat and an experienced applicator are the difference between a surface that lasts fifteen years and one that crazes in two. That is the one place not to economise.
What do I ask the applicator for? Ask for a sample board in your exact pigment and finish, confirm they are tanking and sealing to a wet-area standard, and ask how many coats and what topcoat they use. A good one will talk you through all three without hesitating.
Whatever look pulled you in, start with a single sample board in your chosen tone. Hold it against your light morning and night, and let that one honest swatch tell you whether to go pale and calm or deep and moody. Your seamless, grout-free bathroom begins with that small square.
More stories
Share this story